Sunday, 16 November 2014

Knight Turret Part 3: Finale and post mortem

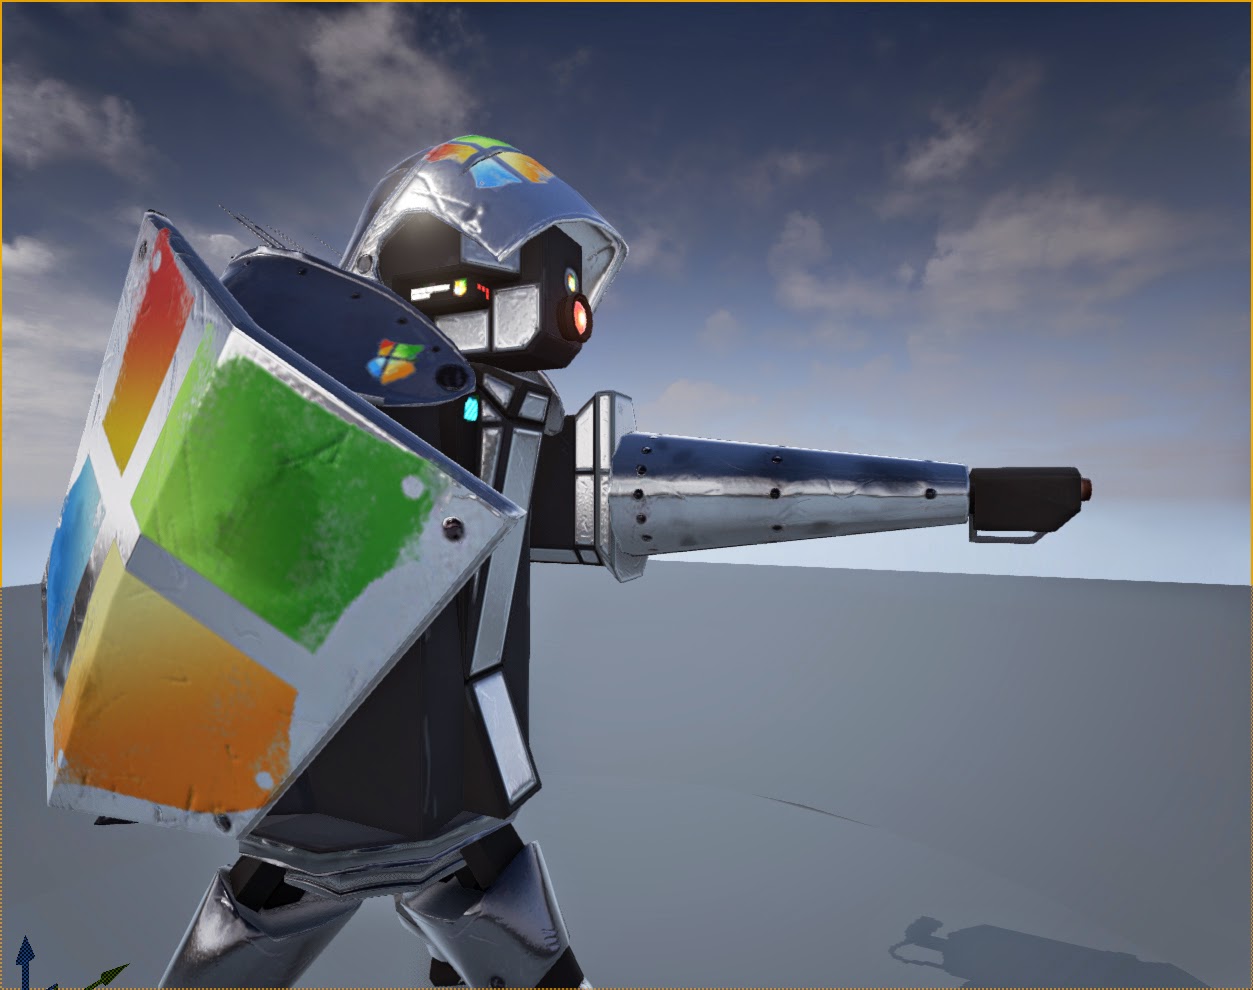
I have now finished my knight project and this last week I have been texturing my turret, making particle effects and editing blue prints to make sure that the sentry gun shoots correctly at the player with the correct sounds and particle effects showing and following along.


I left it last week with me finishing the modelling and baking a high poly model. It was the first time I had attempted baking for Normal and Ambient Occlusion but it turned out quite well and it also meant that I could now  help and teach some of my fellow student how to bake normals improving upon their work and feeding that studio based mentality that is crucial in the workplace.


Once I had the bakes I started making some quick color thumbs and making the basic block-out on the albedo texture. Even though I had some idea I still experimented in engine so I could make sure that it would look right inside a game environment. What I found quite interesting about how I made the textures on this project was that instead of making one at a time I made the textures in parallel so I could understand the how the base colors would effect the end result when combined with certain roughness values and if they were metallic or not. This also helped me further understand how to make roughness maps that would effectively create the reflective quality of polished steel.

I made Albedo, Roughness, Normal, Metalness, Ambient Occlusion and Emisive textures. To save on texture space I combined the roughness, metalness and ambient occlusion onto one sheet in the RGB channels.


I made multiple height maps that would be combined with my baked normal in vary levels of detail so that the end result would have the correct surface properties. These included basic shape and dents, going down to scratches and rust before a final feint grain layer. These normal maps would be merged in crazybump to generate the normal map which would be used on the turret.

The three heightmaps

I also made and textured a bullet and bullet casing for the sentry to fire and eject. The process was very similar to the turret but took much less time. Making a baked normal map and ambient occlusion as well as a simple albedo, roughness and metalness. These textures were 512x512 in line with the brief.

The next step was combining everything in the engine and making sure that it would correctly track and fire at the player. Because I had already tested this during modelling it didn't throw any complications in my way and once the sockets were added into the correct place and the meshes switched I had finished the required section. I then had the chance to pursue some stretch goals and decided that I was going to change the particle effect, add some extra effects and add sound to the gun to bring it to life. One of the particle effects I made was a smoke effect coming from an exhaust on the turret where the ejected shells would come from. This texture would be a 512x512 texture that would be plugged into a material with a rotator and sine so it would swirl like smoke would. This was then plugged into a particle emitter which would slowly rise like smoke and added in a socket into the component blue prints of the turret and spin with the gun.

The second effect was to replace the muzzle flash of the gun with my own. I looked at what muzzle flashes actually look like and created a 512x512 texture which was a white yellow burst. I then made the material translucent and see through which when combined with a very faint fast flash would look like a real guns muzzle flash. The main reason I changed the existing one was that it was too stylized for the turret and would fit. I also experimented with adding a laser sight which didn't work at all despite following multiple tutorials. I eventually decided not to add it which is just as well because I'm not sure if it would fit the rest of the turret.


Finished Model

I also made a physical model out of materials I had lying around (old animator newplast) and a promotional poster for the turret.


Overall I would say that I'm not sure that I'm happy with the results because he textures seem too noisy and crowded reducing the readability of the turrets design. This also broke up the silouette too much which was quite dynamic. I also think that th legs didnt fit the turret and looked too slender and effeminate. On hindsight I would have made them industial bulkt struts rather then try to force the idea that its a knight and let it subtly convey that idea.

I would say though that I have learnt an increadible amount from this project in all areas of asset creation trying many different tachniques to improve the turret and this knowledge is much more valuble then the end result. This has uplifted my spirits and pumped me up for the next project which I a character project.

Saturday, 8 November 2014

Turret Project part 2: finishing up design and orthos

This week was employable week for the uni... this had little impact on me whatsoever because my course is hardcore and keep working through it. I have still been crunching on with the sentry project and this week was spent finalizing my orthographics and modelling. This week I also got a special life drawing session when the Leicester Media School opened, but more about that later (im going to keep this post about the turret).


The sentry project has so far been successful and i'm happy with my design and angle on the project with knights (even though I have decided now that someone else may be doing a knight theme after going back to the drawing board). I have now finished my model after many, many problems with both making the initial models and later on with the high poly model and the baking process, which I have never done before.

After finalizing the orthos I was ready to go onto the modeling stage which was lots of fun. even though at first I found it hard to know where to start once the ball was rolling the model was shaping up nicely. Where I did have some troubles were with my orthographic images wouldn't fully translate into 3D, I realized that I would have to change the shoulder sections as that were too small and didn't look right not covering the "shoulder" section of the body. I also widened the body because even though from the side there was a dynamic silhouette, which conveyed the power and strength of a charging knight, the front was a little skinny and didn't show any strength. I solved both my problems with the FFD modifier in Max which allowed me to make the sweeping changes to the geometry needed without having to redo all my work.


Once I started getting the model into its shape and I had most of the basic blocks down I decided to put it into Unreal so I could make sure that my turret would work with the blueprints before I got too far ahead. This was mostly a success and once I figured out how the components section worked and had my exports in the right positions with the correct pivot points I was able to have the turret tracking me in engine. I also had an experiment with the socket system so the gun actually shot out from the barrel and the muzzle flash would spawn.


Once I knew that my turret would work in the engine i finished up the model and began to make a high poly model as well. I had some problems due to my lack of experience with the turbosmooth modifier and how to get the desired results. Never the less I continued forward and managed to get the look I wanted and slowly went through the long process of baking the normals. This has brought us up to the present where I'm still trying to figure out why the ambient occlusion isnt baking properly. I will now use the rest of my weekend to start the albedo, roughness and metalness maps and catch up on how I have fallen behind on the project. I was supposed to be finished with texturing by the end of Friday which is not the case but because I have one week to go and have already tested with engine I think I may be able to finish the turret by Wednesday with time to adjust anything a chase any loose ends in my project.

Sunday, 2 November 2014

A New Project Comes into the Fray (Turret Saga Part 1)

With the group fun of the toy story project behind, the new project has started which this time is a one man project so its time for some good old fashioned "lone wolf" game art. I was quite excited for the change of pace this new project has brought. While there is still lots of work involved it definitely doesn't have the same vibe as the group projects, where you have to communicate with the other people of the group and spend more of your time working on the social and group dynamics/workflow of the project to make sure it gets done.

This project is a 3 week long task to design and create a turret for a game that will track and shoot at you in engine. The tri budget is 5000 so its a nice medium size portion for this sort of project and there is only one 1024 texture sheet allowed for the asset with 512 alphas for the bullets and particle effects. This timescale gave me one week for concepting, one week for asset creation and one week for engine stuff including the inevitable battle with the blueprint system in Unreal 4. There will be some overlap in the creation and engine stage as tests will be made for the textures in engine and tweaks to pivot points and other such things will become apparent as the engine reveals such problems.

This week has been dedicated entirely to the concept creation stage and has been an absolute blast. One of the lecturers suggested creative games to start the creative juices flowing and it worked a treat. I decided to use a dice to decide the paths I might travel down so I can get some interesting themes into my work. I first created a word generator composed of two lists of cultures, styles and themes which could be combined when a two dice were rolled showing the numbers of the possible route to go down. The first word generator was pretty limited and the answers I was getting weren't to my liking so I decided to go back and iterate on the list so I could generate some really random and interesting topics to go down. My final list were very long and when the dice started rollign I started to generate some very interesting topics to develop further.

I then started cutting ideas from the generated list and took some to the research and moodboard stage where I could start exploring the combinations and find out which ideas had running power. After creating 6 moodboards and one turret moodboard which would be universal I decided to randomly choose from my favorite choices by throwing a piece of paper at my computer screen when all the moodboards were gathered together.

Here are my many moodboards
Desert Dieselpunk (basically Mad Max)

Homeless/homemade Noire (had no clue where this was going)

Contemporary Knights

Musical 50's Futurism

Tropical Pirates

Turrest (universal moodboard)

Cyberpunk afterlife/underworld (I really liked this one circuit board day of the dead came to mind)

Cute Victorian (hence the top hat kitten)

And my chosen topic was...


Modern Knights (contemporary design)

This was quite an interesting idea which was what if classic fantasy knights were still around how would they guard their treasure and keeps, what would these sentry turrets be like? I started exploring further and creating a bask kit from the silhouettes of gathered images on pinterest. Through research I found out about orders and conclaves the knights gathered in and thought about how modern equivalents of this would be corporation and companies like facebook and twitter. This corporate warfare would be something I would like to put into effect with the detailing and textures of the design.


Throughout the project I have been constantly going back and iterating on what I have done. I learnt the true importance of this from the design part of the last project and I do not want the mistake of having an idea or a theme which i wasn't happy with because it would either wind up just being a terrible design or I would run out of steam and not enjoy the project. Because of my revising and updating to all the work though it meant that I could go back and take a closer look at things. I have done this with the moodboard quite a few times as with every stage I have refined and explored what it is I am looking for while also seeing if there are any new directions to go in. This helped during the bask kit stage where I didn't like many of the silhouettes I was getting out and thought I would go back update the moodboard and the bask kit to get some more interesting shapes which I can combine.
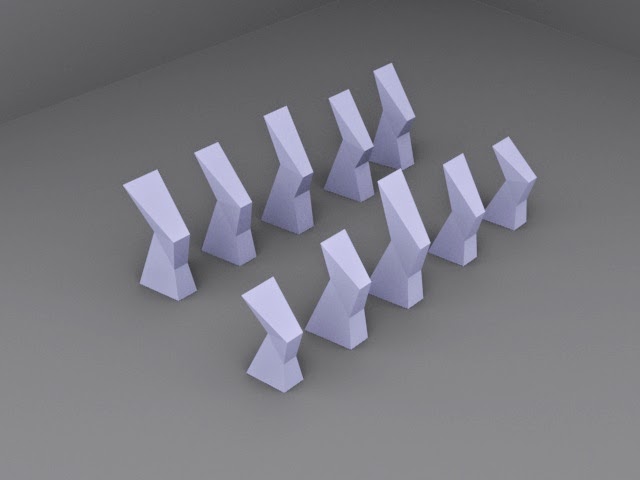
Original bash kit and resulting thumbs

Updated bash kit and resulting thumbs


Viola! I took some design which I liked and started developing them. I thought the first step would be to see why it was I actually liked these designs and de-constructed them into their basic shapes and silhouettes which I then changed and tweaked not worrying acknowledging that it was necessarily to do with a turret. I found some basic shapes I liked and I took my favorite into 3DS Max and tweaked it as well as testing that it was still and interesting shape from multiple angles in a 3D environment.


I then added these shapes and favourite bashes into my moodboard to keep me up to date with what I wanted. I expanded the moodboard with more pictures yet again and started drawing more detailed thumbs. These thumbs had 5 main families that were inspired by my favourite bashes. I took my favourite thumbs and started dissecting what made them good or bad. I then developed my favourite one which was the family consisting of humanoid turrets that would look like charging knights. Leaning forward with gleaming Armour engraved with their parent company order and protecting their lieges lands.


Now just to catch up on other things, this Sunday's project was supposed to be Bradgate Park however because it rained I decided I would go to the Guild Hall and repeat that project.... It turns out that the Guild Hall is now closed for winter (just my luck) so I went into the cathedral next door and made this my guild hall type project.


I actually got caught in an evening mass which was quite funny topping off an odd day for me.